Making Do: Socks for Playtime
by Nancy Nickolson, Family Programs Coordinator, and Julia Petrov, Acting Head of History
May 25, 2020
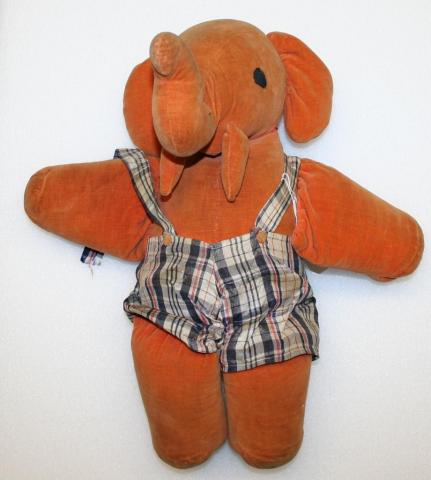
Soft toys in the shape of animals have been popular since the nineteenth century. They are usually made by big companies and bought in stores, but because of their small size, they are also easy to make at home.
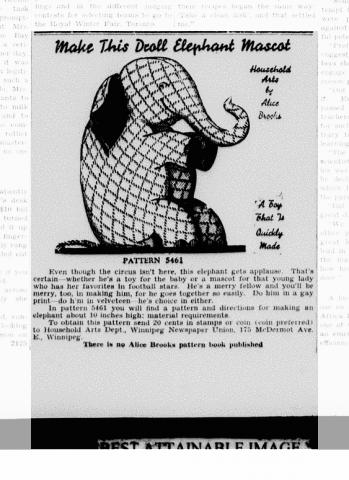
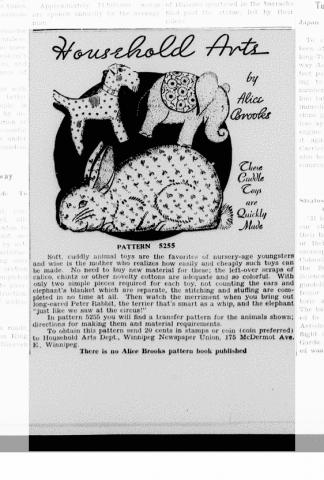
During the Depression years of the 1930s, newspaper readers could order transfer patterns to make and decorate stuffed animals from fabric scraps housewives already had. Popular animal patterns included cats, dogs, bunnies, giraffes, and elephants. This was a cheap and easy way to give children toys when parents couldn’t afford to buy them in stores. Older children could have even made them up themselves. Some of these homemade toys were also sold at bazaars to raise money for charity during this difficult economic time.
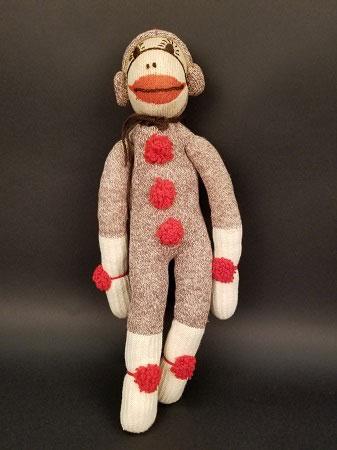
In the 1950s, an American company, Rockford, started to include patterns for toy monkeys and toy elephants with every package of their work socks; once Dad’s socks wore out, Mom could transform them into a toy for Junior. Sock monkeys, with their distinctive red lips, are still popular today, and you might even have one or two at home.
In the Collection
From the Archives
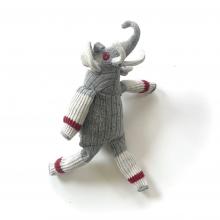
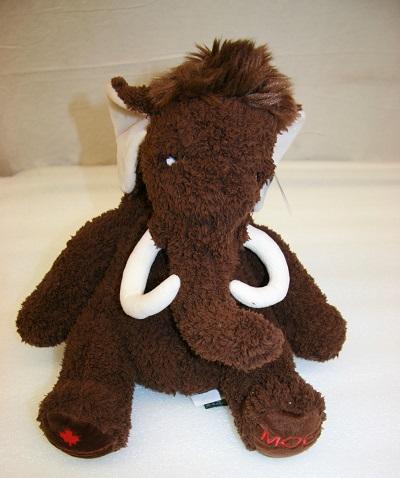
How to: Make a Sock Mammoth
Make your very own soft toy to keep you company at home! We have taken inspiration from vintage toys in RAM’s collection to share a project to make our mascot animal, Moe the Mammoth!
While our pattern uses socks, remember that you can get creative, and make your own mammoth and other toys out of paper, felt, fun fur, fabric, or even pipe cleaners.
Difficulty: Medium
Time: Day project
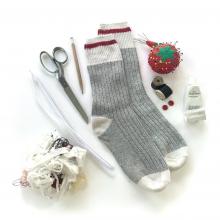
What you’ll need:
- Pair of old socks
- Needle and thread
- 2 buttons
- Scissors
- Pencil or marker
- Pins (sewing pins or safety pins will work)
- 2-3 pipe cleaners
- Stuffing - Fabric scraps, cut up rags, pillow fluff, etc.
- white paint, paint brush, and tape *optional
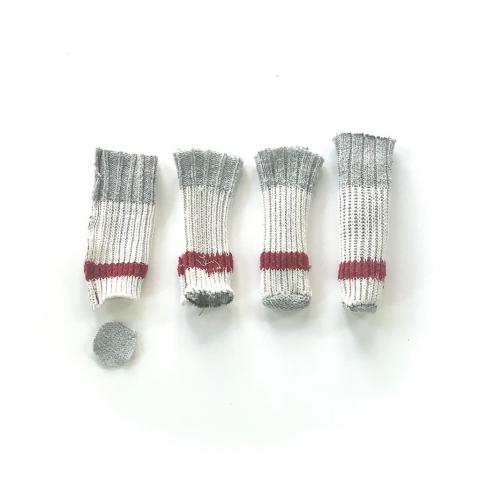
1. Find a pair of socks. Ideally, pick a pair with holes. This project can give them new life!
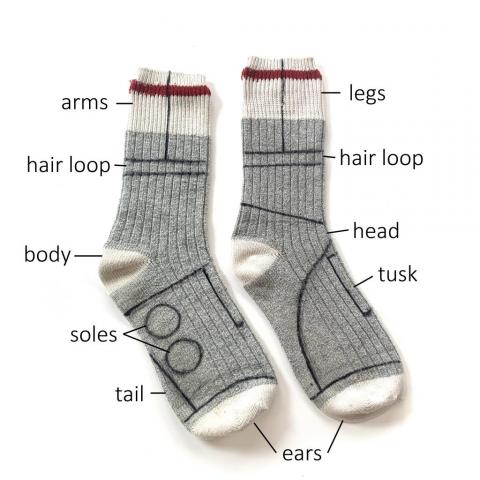
Remember: The size, colour, and shape of your sock will create your unique version of the sock mammoth.
2. Cut up your socks using fabric or craft scissors. Save the leftovers by cutting it up to use as stuffing.
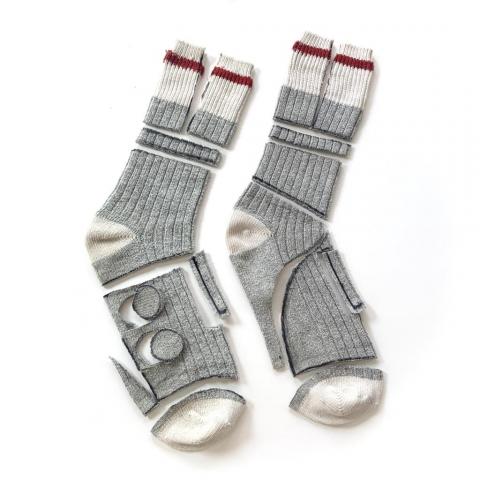
Tip: If your socks have holes, this is the time where you might want to patch them up.
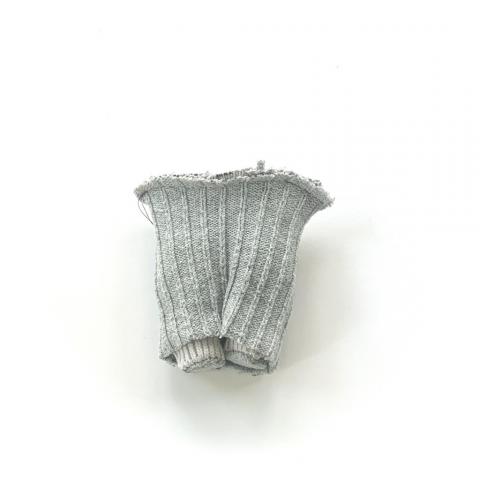
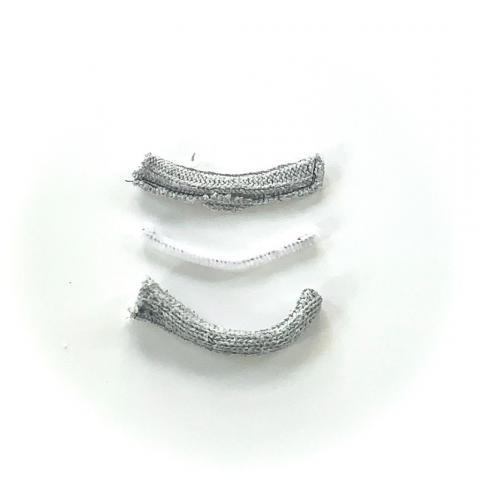
3. Sew all 4 arms/legs.
a. First stitch along the side of the rectangle, with the good side facing in.
b. Then sew on the sole on one end of the arm or leg.
c. Then turn right-side out.
d. Fill with stuffing.
Cool tip: Use the inside of the sock as the outside of your sock mammoth. The loops of the sock look furrier, like a real mammoth!
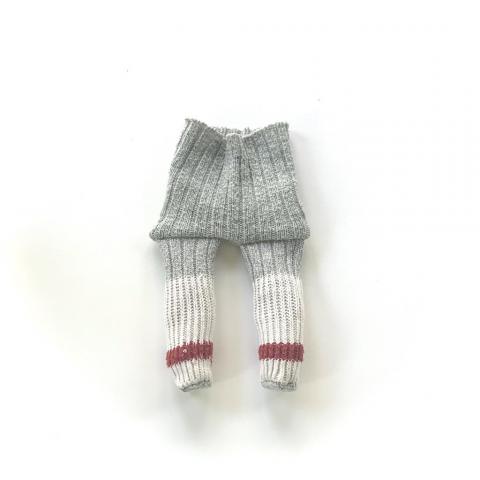
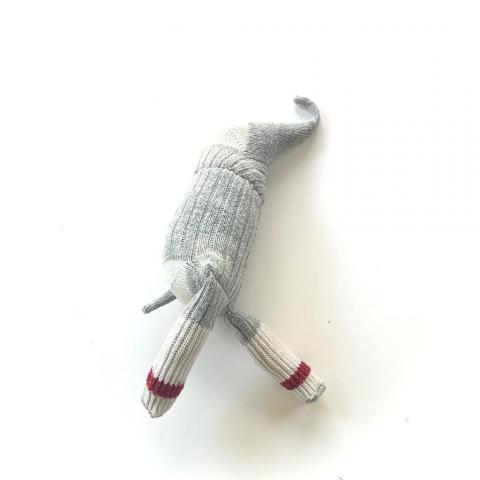
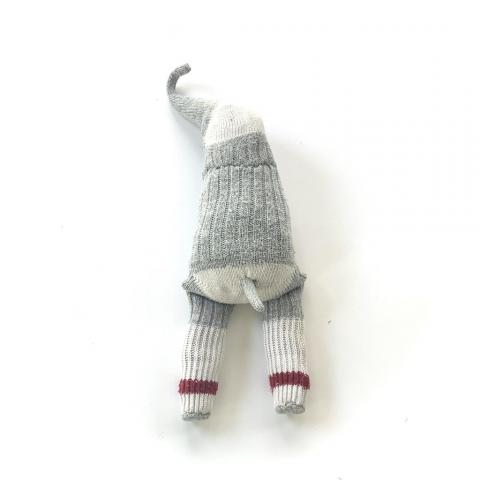
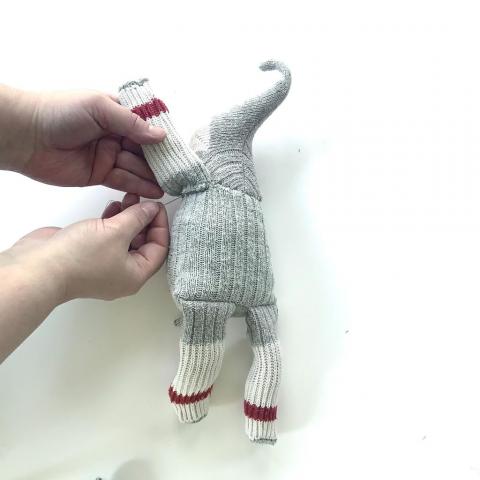
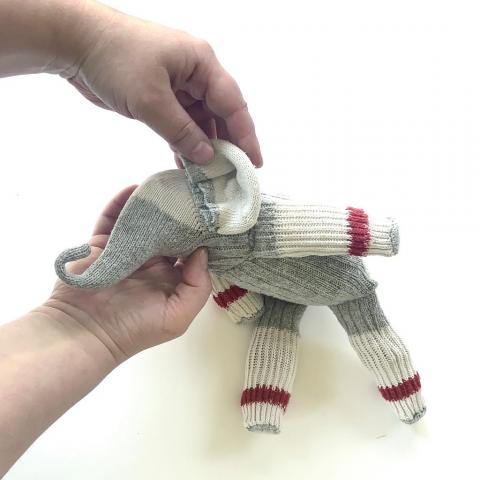
4. Sew legs on the body. To do this, place the legs inside the body. Stitch along the end closest to the sock heel. Turn right-side out.
|
Image
|
Image
|
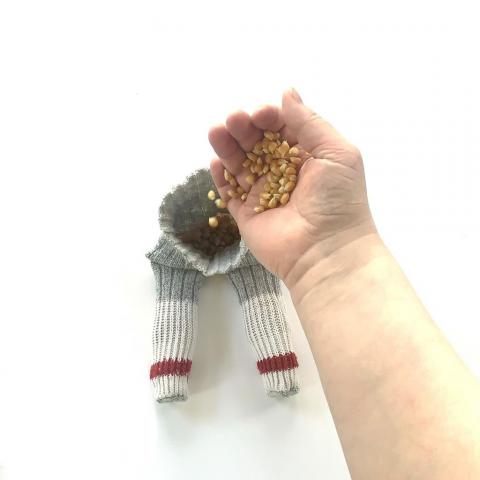
5. Fill the body with stuffing. Remember to use the leftover sock pieces, cut up into small pieces.
|
Image
|
Image
|
Tip: To stuff your mammoth, you can use lots of different materials. Rice, lentils, dried beans, or corn kernels can be used to weigh down the bottom. This will make it easier for the mammoth to sit without falling over.
6. Let’s work on the head. Sew the head inside-out, then turn right-side out.

Take a pipe cleaner and shorten it so it is 1/2 inch bigger than the length of the head and trunk. Bend the pipe cleaner 1/4 inch at each end. This will prevent it from poking through. Slide the pipe cleaner through the head down into the trunk. Now the trunk will be poseable!
Tip: To shorten a pipe cleaner, bend the pipe cleaner back and forth until it breaks at the desired spot. Don’t use your scissors – this will damage them.
7. Stuff the head with stuffing. Set aside.
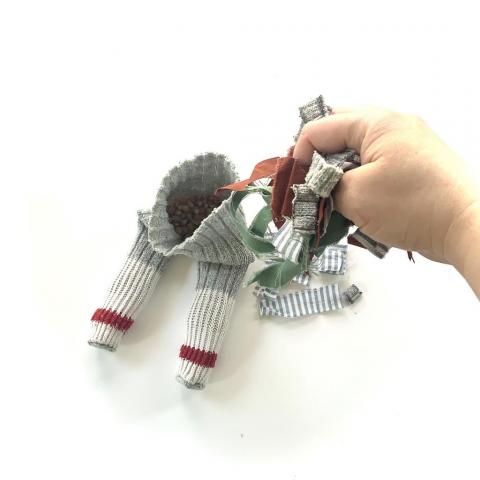
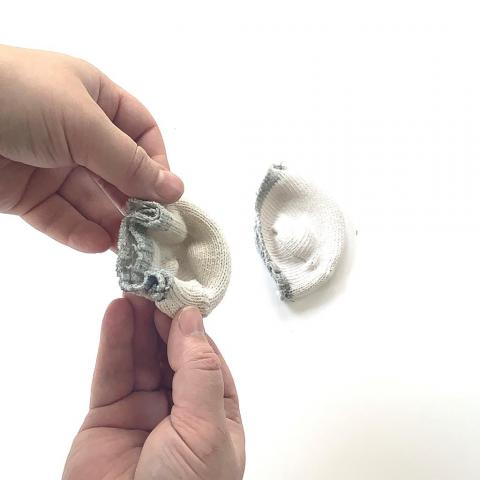
8. Let’s work on the ears. Bend pipe cleaners inside each ear. Shorten the pipe cleaner to length, leaving a little extra so that the ends can be bent over. To ensure the pipe cleaner stays in place, stitch through the sock and around the pipe cleaner at the ends of the pipe cleaner.
|
Image
|
Image

|
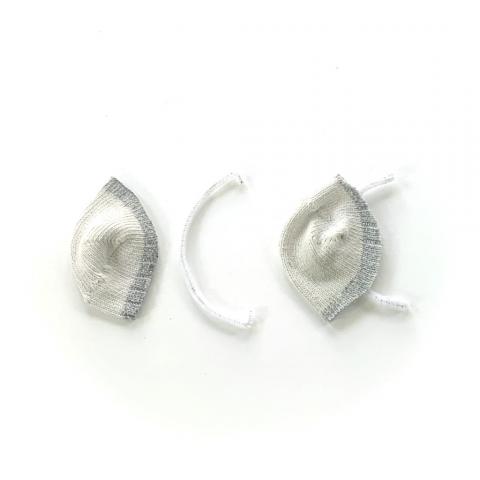
9. Sew your tusks and turn right-side out. Slide pipe cleaners inside the tusks (remember to bend down the ends)
Tip: Turning the tusks right-side-out can be difficult, so you may want to use a pencil, paint brush handle, or other thin object to push the fabric through. Alternatively, you could choose to make your tusks out of felt, pipe cleaners, or other materials you have available.
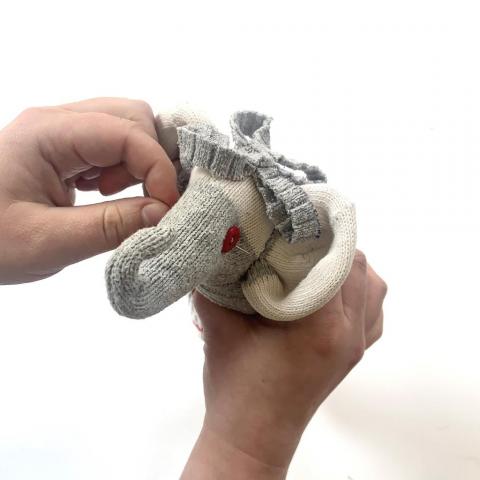
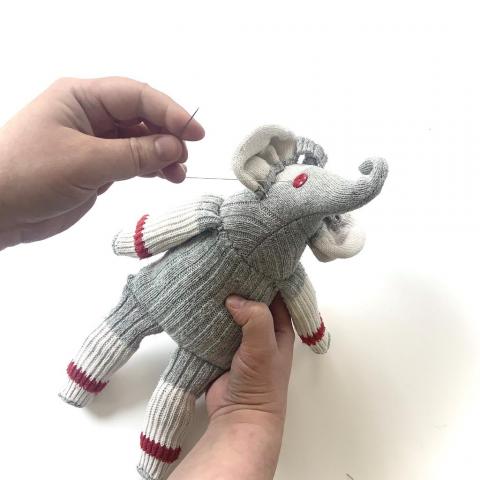
10. Sew the head on the body. Try to fold the edges of the sock inside the body so you don’t have any fabric edges showing. Pins will help hold the head in place while you sew.
Tip: Start sewing from the middle, and work your way around the neck.
11. Sew tail, turn inside out, and stitch on.
12. Sew arms on along the neck seam. Sew from the underside to ensure all fabric edges are nicely hidden under the arm.
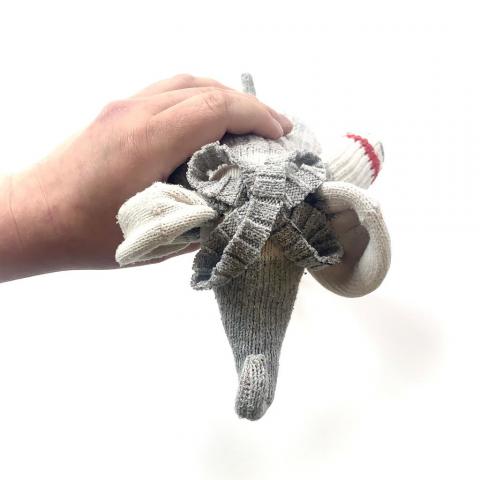
13. Sew ears on by folding to get the shape you want. Use the sock’s heal seam to help place the ears.
|
Image
|
Image
|
14. Give your mammoth a hairstyle! Sew hair loops on the tops of the head with a few stitches. For maximum hair body and texture, lay hair loops down in a figure 8, crisscrossing each other.
15. Sew buttons onto the side of the head.
|
Image
|
Image
|
Tip: If you sew through the head to attach both buttons at the same time, the eyes will become inset, giving your mammoth a more realistic look.
16. Stitch on tusks. Paint tusks to make them stand out. Use tape to protect the surrounding fabric.

17. Now it’s time to personalize your creation!
|
Image
|
Image
|
Image
|
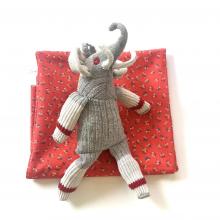
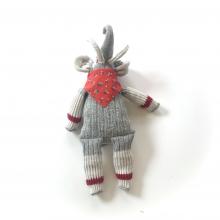
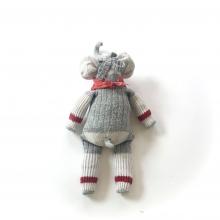
Here we’ve used a small piece of fabric cut into a triangle to make a scarf.
Congratulations! You’ve made a sock mammoth!