By Carmen Li, Head of Conservation, and Shauna Coombs, Former Assistant Curator, Geology
November 15, 2016
Most visitors to the old museum fondly remember the finger rock - a touchable rock covered in holes that was located near the entrance to the geology gallery.
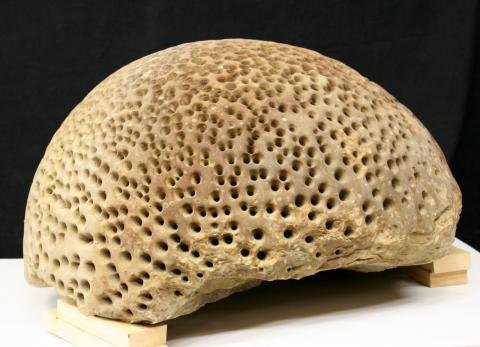
In geological terms, this rock is a voidal concretion. Collected in 1968, it was one of the first objects to be added to the museum’s geological collections. Voidal concretions form after sediments are buried and minerals from groundwater slowly cement them into sedimentary rocks. Sometimes, the mineral cement will precipitate around a nucleus or centre, such as a leaf, shell, bone, or fossil, forming patches of more resistant rock. These cemented patches of rock are concretions. They can form in all shapes and sizes. The numerous holes on the surface of this concretion were formed through a dissolution process where crystals of calcite in the rock dissolved away, leaving the void spaces.
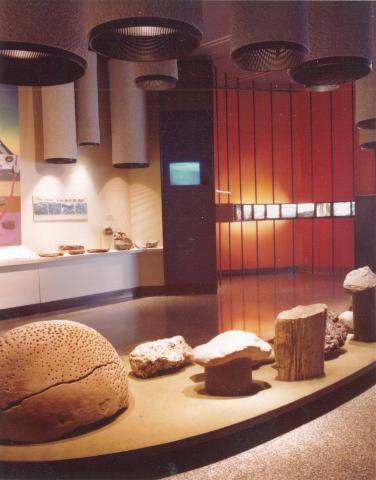
Above: The original geology gallery with the finger rock on display. The rock was collected in Edmonton in 1968 from a city engineering storm sewer project.
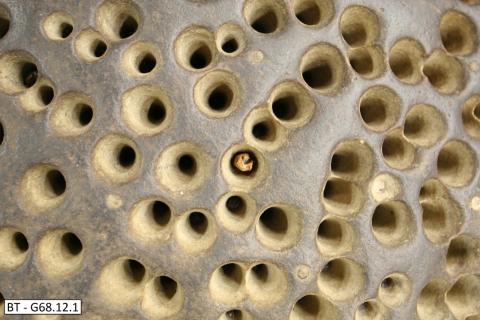
We think of rocks as being durable. And for the most part, they are! However, after decades on display and being touched by many, many pairs of hands, the finger rock’s surface had a dark patina – a compacted layer of finger grease, dirt, and grime. Many of the holes had been filled with an interesting collection of paraphernalia, including bits of pencils, a stick, and assorted coins (13 cents in total).
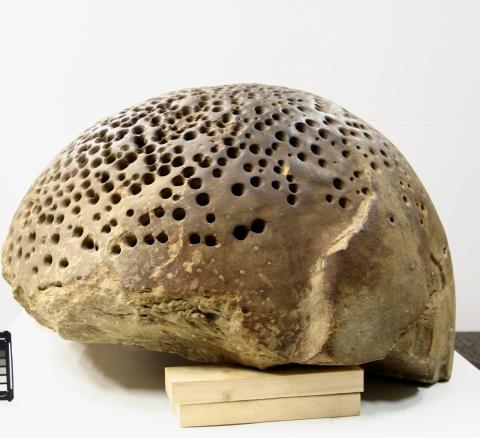
Above: The finger rock BEFORE it was cleaned. Note the greasy dark patina. (The photo at the top of this blog post is of the rock AFTER it was cleaned. Big difference!)
Above: Close-up of the finger rock before cleaning. Can you see the snapped-off pencil?
Aside from using a vacuum to extract the debris and accumulated dirt from the holes, or voids, we needed a method of cleaning the rock. The conservation team tested several cleaning solvents but the one that performed the best was actually spit! Conservators and restorers have used saliva cleaning for more than two centuries; parents the world over have intuitively used saliva cleaning far longer. What makes saliva such an effective cleaner? It contains an enzyme called amylase that is very effective at breaking down dirt.
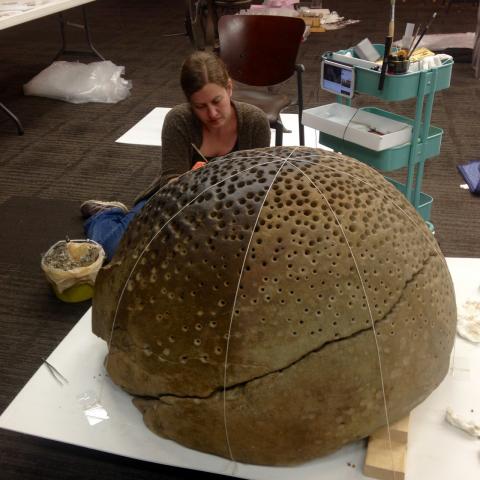
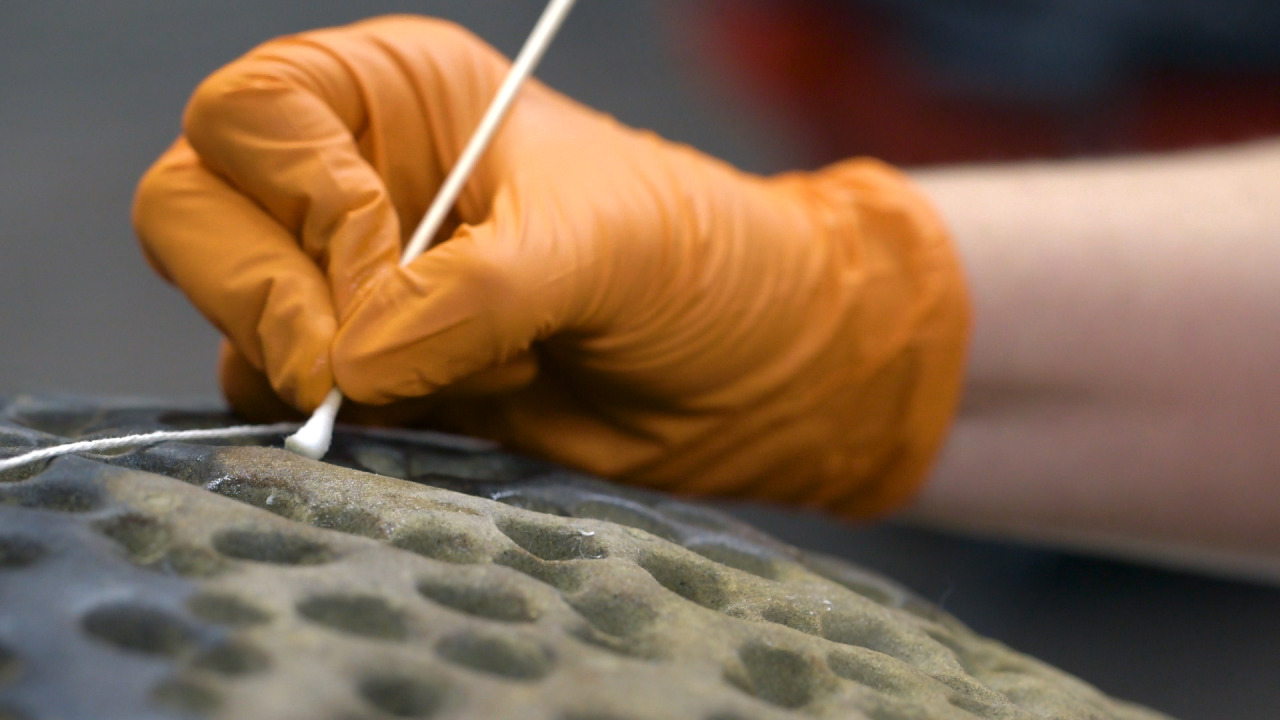
Above: Conservation technician Susan Green “spit-cleaned” the finger rock using her own saliva and cotton swabs. While wiping away the grime with one swab, she’d be preparing another swab in her mouth to expedite the process. After cleaning, she rinsed three times, using cotton swabs dampened with de-ionized water. (She used 1,500 spit swabs and a further 4,500 water swabs.) The results are dramatic!
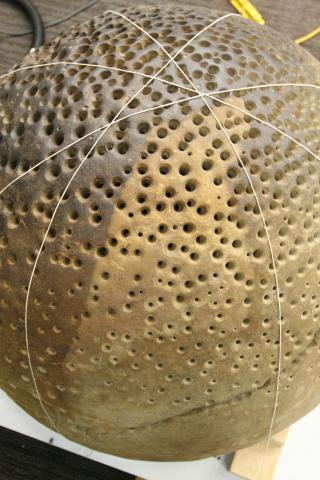
Above: Susan began the conservation process by vacuuming dust plugs (dust bunnies squished by little fingers) out of every single hole in the finger rock. She soon realized, however, that she was vacuuming the same holes over and over! Using string, she divide the rock into sections to be more systematic with the cleaning process.
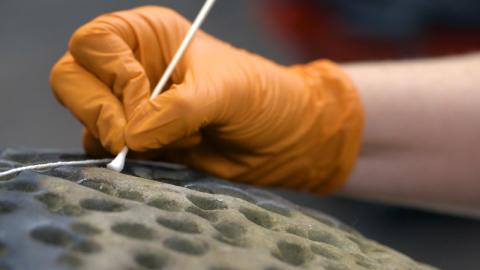
Above: Rinsing off the surface of the concretion using a cotton swab moistened with water.
It’s actually a bit tricky to replicate enzyme cleaning in a lab. Success requires high purity enzymes, good lab techniques to avoid contamination, careful temperature regulation, ion-balancing, and experimentation with various concentrations. Saliva is free, totally formulated for use, and requires no health and safety precautions. The only danger is accidental double-dipping!
It took Susan 60 hours to clean the finger rock, which is now ready for another debut in our new galleries downtown.