Build a banjo and jam out!
By Nancy Nickolson, Family Programs Coordinator, and Julia Petrov, Acting Head of History
December 29, 2020
For as long as we know, humans have been making music. The urge to make music is so strong, that through time people have been resourceful, crafting their own instruments using unique and unexpected materials.
A model T car door. An old soup pot lid. A mop. A tea kettle. A wooden wagon. A glass washboard. These are just a few of the materials used by Albertans to create instruments.
In the Collection
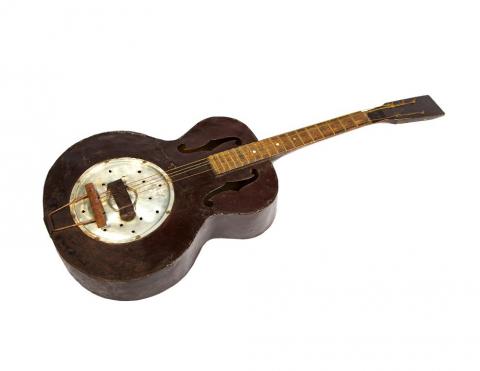
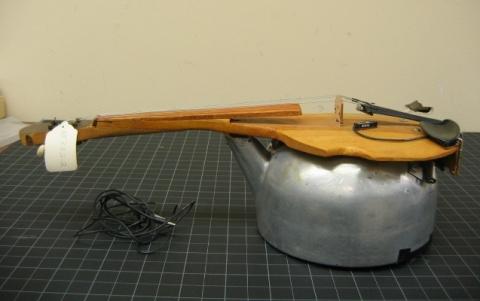
The Thalhumers were a musical family, but during the Depression years, money was not available to buy additional instruments. At 17, Pete Thalhumer made this steel guitar for his younger brother Joe, who was eager to learn to play. Pete had access to blacksmithing tools because his father was the village blacksmith for Winfield, AB. Pete made the body of the guitar using the door panels of a 1927 Model T Ford car. The circular metal resonator on the belly is made from an old soup pot lid. The fingerboard is made from a wooden wagon tongue with 18 metal frets while the strings are attached at the base of the guitar by a U-shaped metal rod taken from a mop. Although the guitar is quite heavy, it produced good tones. Joe learned to play the instrument and accompanied Pete playing at various social events. You can see this guitar in person in the Human History Hall, as part of the “Life in the Depression” story.
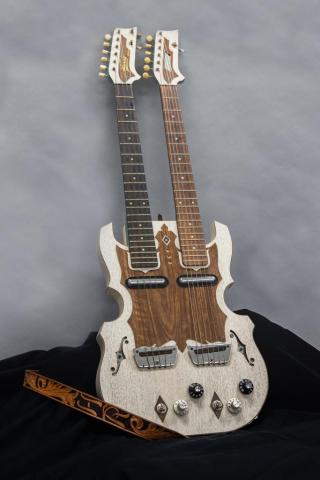
Double neck guitar made out of countertop material
Dene musician Harry Rusk made this guitar from his own original design while serving in the Signal Corps. It is made from arborite, a laminate material commonly used to make countertops. Harry proudly applied his name and initials to the necks and the handmade tooled leather strap. He played the guitar at country and western dances in Vancouver, Fort St. John and Fort Nelson. Harry had taken some wiring lessons as a teenager while recovering from tuberculosis at Edmonton’s Camsell Hospital. He drew on that knowledge when wiring the guitar and making the double electric hook-ups (one for each set of strings). The lower neck is set up as a regular six-string guitar, the upper neck is set as a mandolin with six strings. Harry also made the case for the guitar. After he became a successful Nashville country singer/songwriter, Harry continued to craft guitar covers, straps, and cases for his instruments.
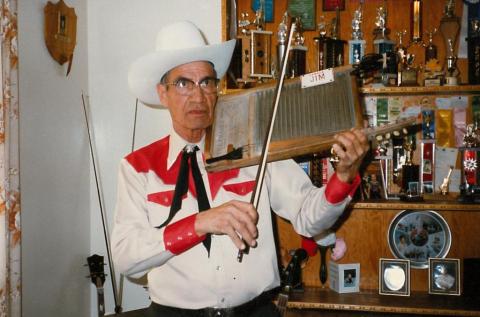
Jim St Germain grew up in the Shaftsbury Settlement in the Peace River region, where he learned music from his Métis family and the nearby Catholic Mission. Jim was also a great builder, helping to restore the church, building models of the paddle wheel boats of his childhood, and making improvised instruments like these. He once said “you can make a fiddle out of darn near anything.” These fiddles, made from an aluminium tea kettle, and an antique glass washboard, were exhibited at Expo ’86 in Vancouver, after which, we acquired them. In choosing these items as the base for his fiddles, Jim wanted “to pay tribute to the pioneer ladies” of Alberta. The washboard can actually be played not just as a fiddle, but also a mandolin, and a rhythm instrument.
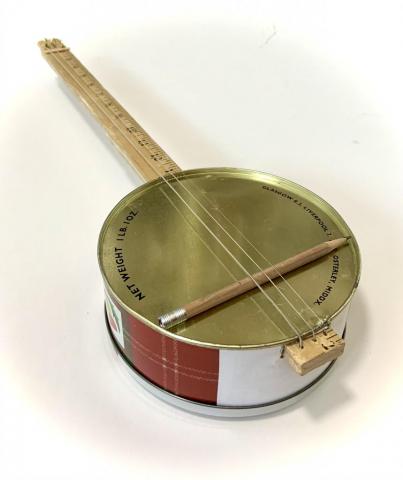
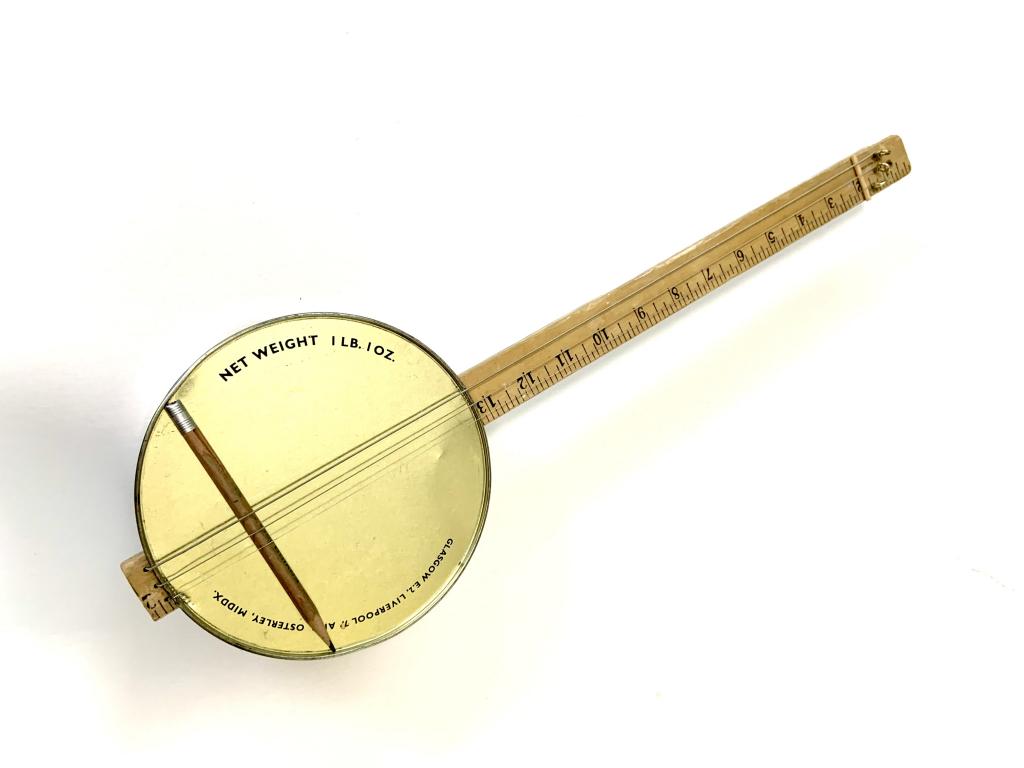
How to: Make a cookie tin banjo
Follow in the tradition of these musicians, and make your own instrument! Use your own creativity and design your own using whatever materials you have, or try making our DIY banjo.
Time:1 hour
Difficulty: medium
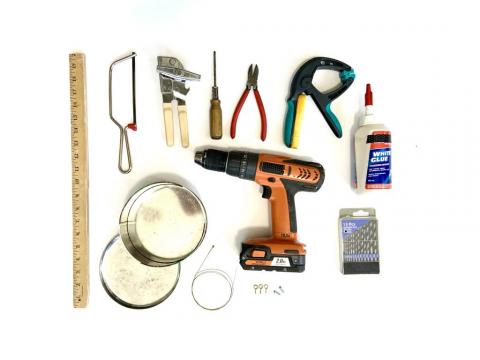
What you’ll need:
- Wooden metre stick
- Empty cookie tin
- 3 Eyelet Screws
- 2 small screws (no longer than 3/8”)
- Hand saw
- Wire, fishing line, or guitar strings
- Pencil
- Can opener
- Screw driver
- Wire cutters
- Clamps
- White or wood glue
- Drill and small drill bits
- Marker
-
Saw the metre stick in half.
Image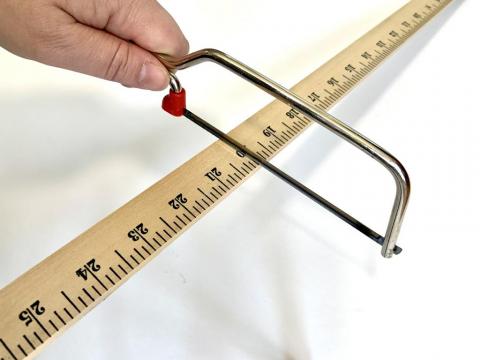
-
Glue the two halves together, and clamp them together. If you don’t have clamps, you can tape them together and place something heavy on top. Let the glue dry overnight.
Image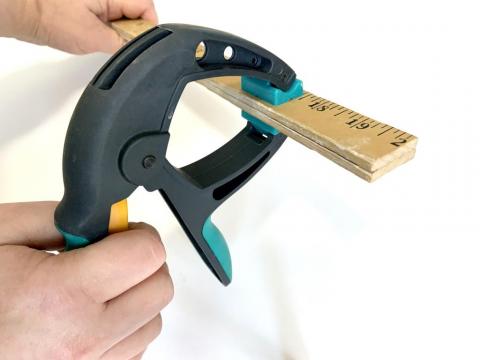
-
Use a marker to trace the size of the holes you need to make the ruler go through the cookie tin. One on each side of the tin. The bottom of the cookie tin becomes the front of this banjo, so the position the holes near the bottom of the tin.
Image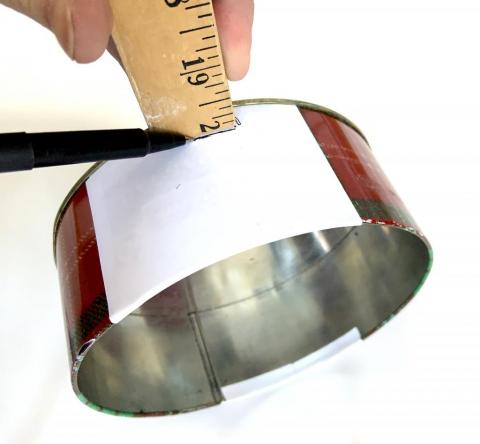
-
Drill five holes on the rectangles you traced. One in the middle, and one on each corner. Be careful not to make the holes too big; you want the ruler to fit tightly.
Image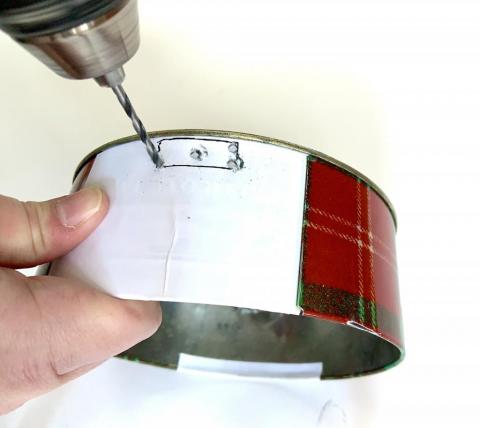
-
Use a can opener to cut across the two bottom holes. Use your wire cutters to cut the short side sections.Use a screw driver or pliers to bend the flap back into the body of the tin.
Image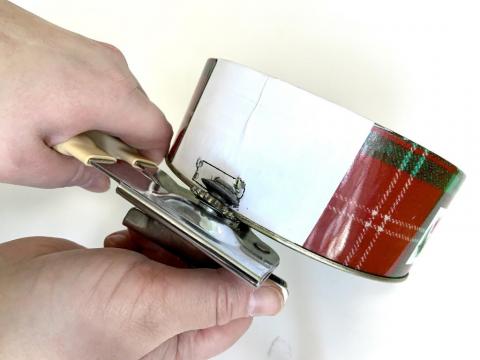
-
Switch back to your metre stick. Drill three small holes in a row on the end of your metre stick for the strings.
Image
-
On the other end of the metre stick, screw in three eyelet screws. Make sure to space them out so you can turn them freely.
Image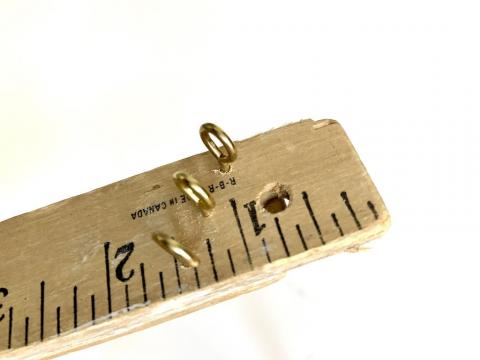
-
Insert the metre stick into the tin, with the eyelets facing the bottom of the cookie tin. The metre stick should go through one hole and out the other, sticking out enough at the other end at the holes you made for the strings are showing.
Image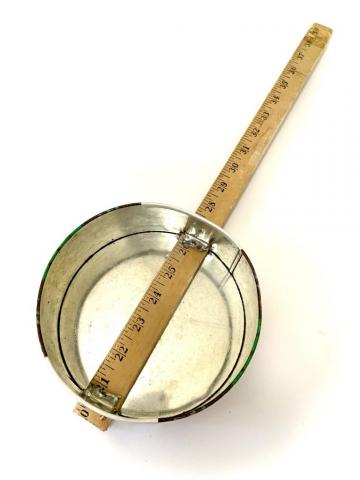
-
Insert the two small screws into the metal flaps inside the tin. Make sure to choose screws that are no longer than the thickness of your double-thick metre stick.
Image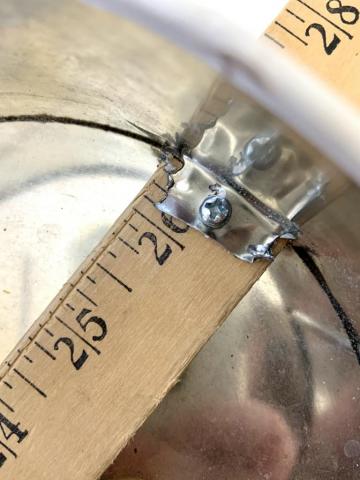
-
Put the strings through the holes at the bottom of the metre stick.
Image
-
Pull the strings up over the tin, along the length of the metre stick, and attach them to the eyelets. Cut the excess with wire cutters. Tighten the strings as needed by turning the eyelets.
Image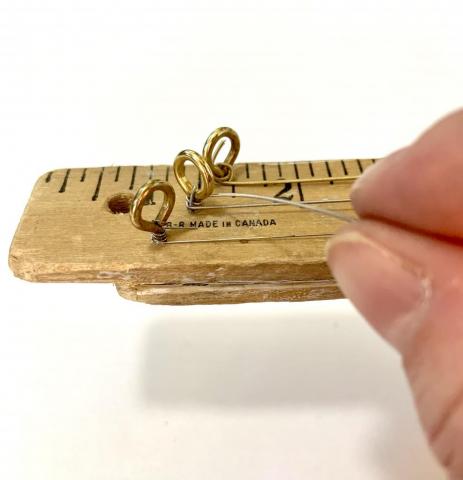
-
Place a pencil or piece of wood scrap under the strings at the top and near the bottom of the instrument.
Image
-
Play a tune! Entertain your loved ones! Rock that banjo!
Image